What is this about?
Have you ever wondered how to quickly add a drop shadow to a screenshot on your Mac machine? This simple task can be difficult to achieve if you don’t own an image editor like Photoshop. But if you know how, it just looks so neat!
So, you want to send a nice email and highlight a screenshot you took? Something like this maybe?
Actually this is easy to achieve. You will need to go through a few setup steps. Once everything is done you’ll be able to add a drop shadow with a simple right click action on every image you want.
Setup
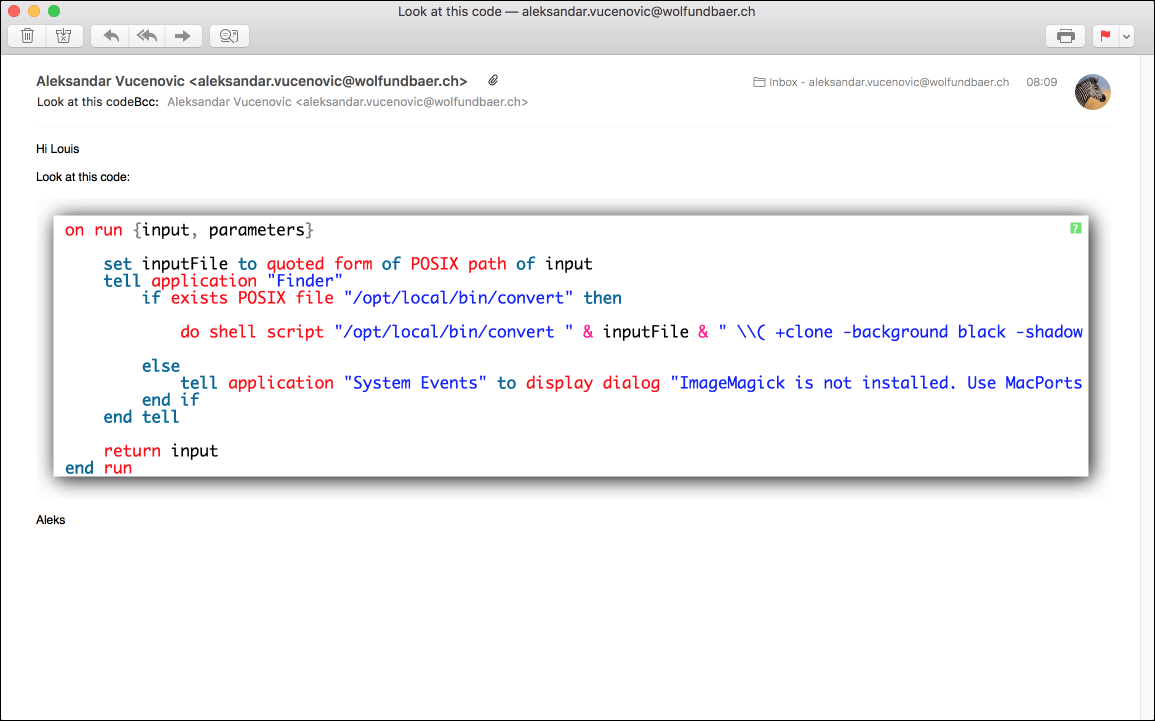
In order to add a drop shadow we will use an OS X Automator Workflow and a program called ImageMagick. We will need to first check if ImageMagick is installed. If not, we’ll need to install it first. Then we’ll install the Automator Drop Shadow Workflow, and we’re done.
- Open a terminal ( Hit [cmd]+[shift]. Search for “terminal”. Start “terminal”. )
- Type: which convert
- If you get an output like “/opt/local/bin/convert” then ImageMagick ist installed and you can skip to step X. Install ImageMagick with the MacPorts or Homebrew or package manager.
- Both package managers do basically the same thing. You can choose either of those. For keeping this description lean, we’ll use MaPorts.
- Go to https://guide.macports.org/chunked/installing.macports.html and follow the OS X Package Install procedure. Open a terminal and type: sudo port install ImageMagick
- Download the Drop Shadow Automator Workflow from here: https://goo.gl/jTDiU6
- Unzip and double click the uncompressed Drop-Shadow.workflow file
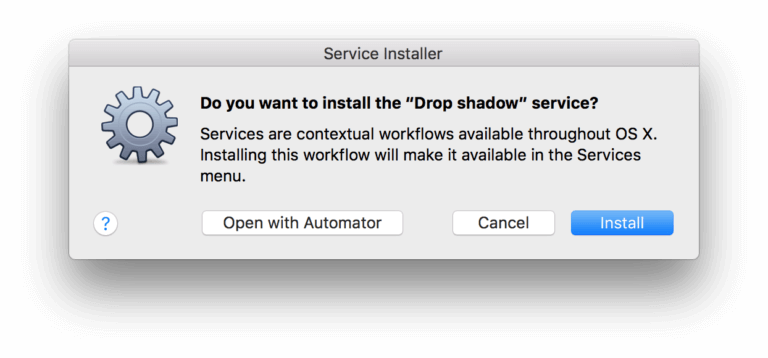
- OS X will ask you if you want to install it.
- Click ‘Install’
- Done
Now browse to an image, right click on it, choose -> services -> Drop Shadow.
After you click on it a copy of the image with a drop shadow will be created in the same folder (eg. Desktop).
Enjoy!